We are very pleased to introduce a new feature to Hush™ Secure Forms - body charts. We’ve also added several new intake forms to our template directory that make use of the new feature.
With body charts, you can create forms that enable your patients to place markers on images to indicate points of pain or discomfort that they can describe in associated fields. This pinpointing ability lets you create more comprehensive intake forms so you can prepare for appointments before your patients arrive.
If you’ve built forms before in Hush™ Secure Forms, you’ll find that adding a body chart is similar to adding other features. However, there are a few rules that only apply to body charts. We’ll go over those, along with the basic setup and the new templates in today’s post.
How to add body charts to your forms
When you’re building a form, or editing one of our templates, you’ll find the body chart feature under Advanced fields in the control panel along the left side of your form builder. When you drag and drop the body chart feature into your form, a stock image will appear along with pain type and severity fields. These are all customizable.
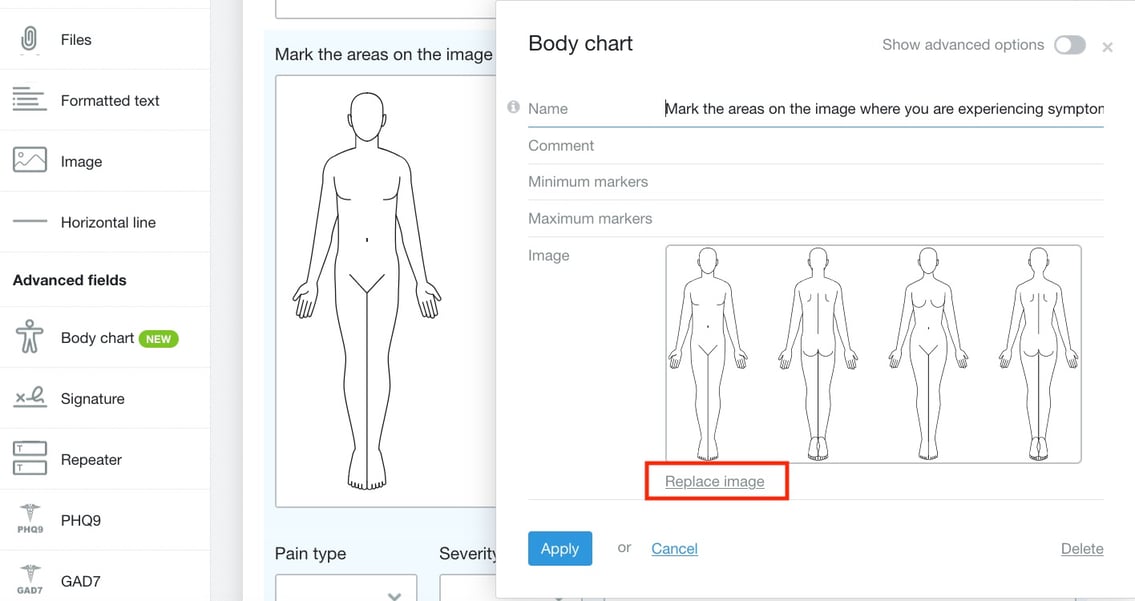
How to change the image
- Click anywhere on the feature to open options
- Click Replace image
- You’ll have the option to choose to either upload your own image or select an image from our stock image gallery

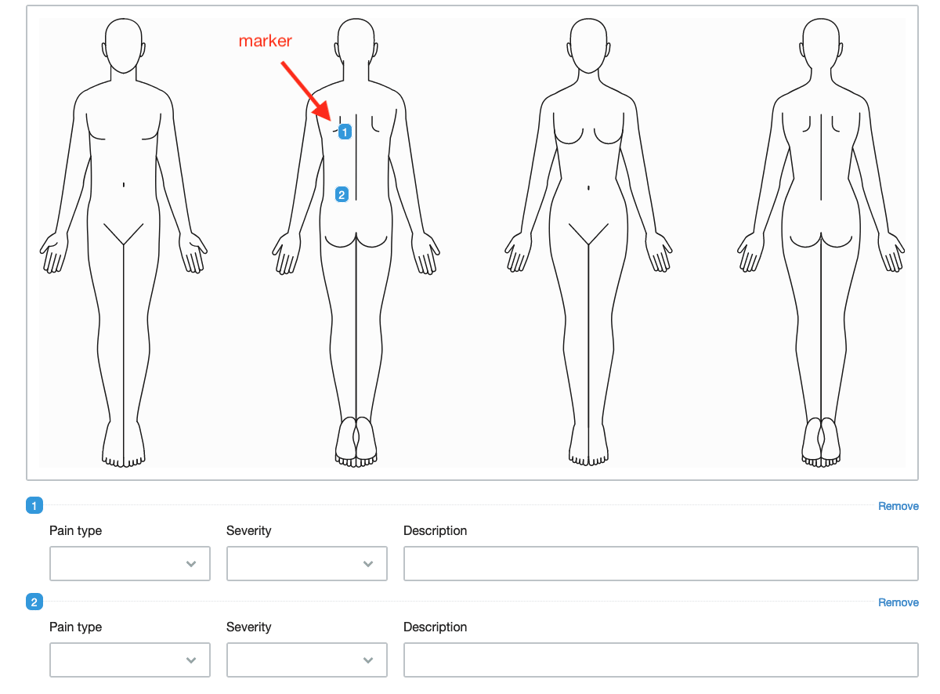
What are markers?
Markers are the blue indicators patients can use to mark areas on the image. You can set the minimum and maximum number of markers patients can place on an image. When completing the form, your patients will be able to adjust their placement of the markers by dragging and dropping them. Each time a new marker is dropped onto the image, the fields you set when you created the form appear for the patient to fill out.

How to customize the fields
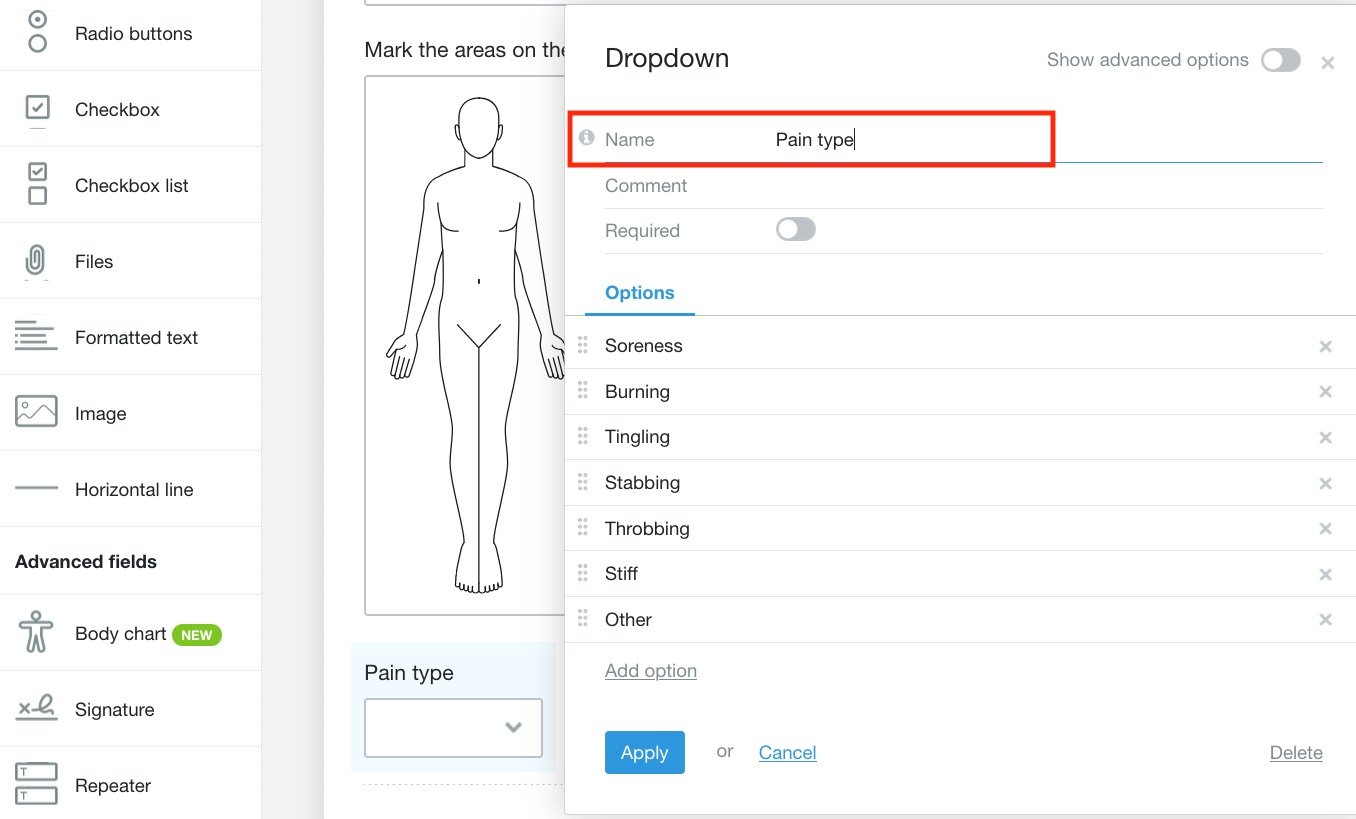
Change the field titles
- Hover and click the sections you want to edit, and the customization window will appear
- You can then change the field titles

Add new fields
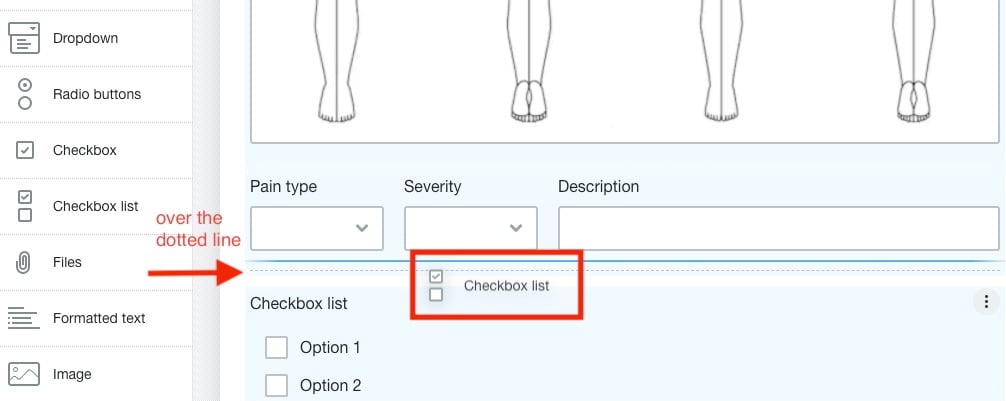
You can drag and drop new fields onto the body chart either by dragging them directly from the form's control panel or by duplicating fields you already have on your form.

☆TIP - The field will need to be dragged over the dotted line so that it's part of the body chart feature. This ensures that the field is duplicated when a new marker is added.
Body charts and conditional visibility
Like our other features, you can set the body chart to appear when a condition is met. You can set this up by clicking Show advanced options to set a condition. You can read more about setting conditions in our blog posts: Using field conditions in your web form and Advanced techniques for using conditional visibility in web forms.
Body charts in our template directory
We’ve added body charts to a few new templates in our template directory. We encourage you to take a look at these templates to get an idea of how body charts might be used in your practice.
How to add body charts to your plan
Body charts are available on all our Healthcare Growth plans and our Healthcare Essential plans with five forms or more. If you're on a different plan, you'll be given the option to upgrade when you add a body chart to your form.
Start creating web forms with body charts

|
With body charts, you can create forms that allow your patients to place markers on images to indicate points of pain or discomfort that they can describe in associated fields. This pinpointing ability lets you create more comprehensive intake forms so you can prepare for appointments before your patients arrive. If you’ve built forms before in Hush™ Secure Forms, you’ll find that adding a body chart is similar to adding other features. However, there are a few rules that only apply to body charts.
Related posts:
|


