Take your secure web form to the next level with advanced tips
If you’ve tried our new Hush Secure Forms, you know how simple it is to create a customized form with the drag-and-drop form builder. The builder is very self explanatory, and it’s easy to jump in and start building forms even if you have no previous form building experience. However, there are a few features in Hush Secure Forms that aren’t immediately obvious, yet will greatly improve the functionality of your forms if used correctly.
These “hidden” features aren’t particularly tricky, but they do require a bit more work than the standard dragging and dropping. Today, we’re explaining in step-by-step detail how to make use of these advanced features.
How to include live links within your forms
First, if you haven’t already started using Hush Secure Forms, read through our A quick start guide to Hush Secure Forms and Build a customized secure web form using a template for tips on building a basic form.
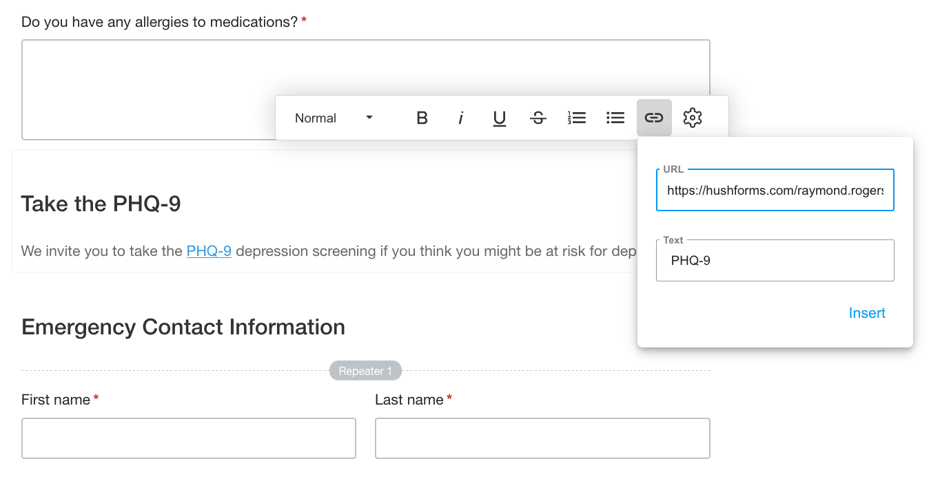
Including links within your form is a useful way to easily direct your clients to additional information. For example, you may want to link to your privacy policy and terms of service. Or you may want to link to another form. In the example, below Dr. Rogers invites clients filling out his New Client Questionnaire to take the PHQ-9 depression screening.
To include a link, drag and drop a Formatted text field into your form.
Then, highlight the text you want to show up as a live link, click the Insert link button on the formatting bar, and type in the URL.
How to set the subject line to use information from the form
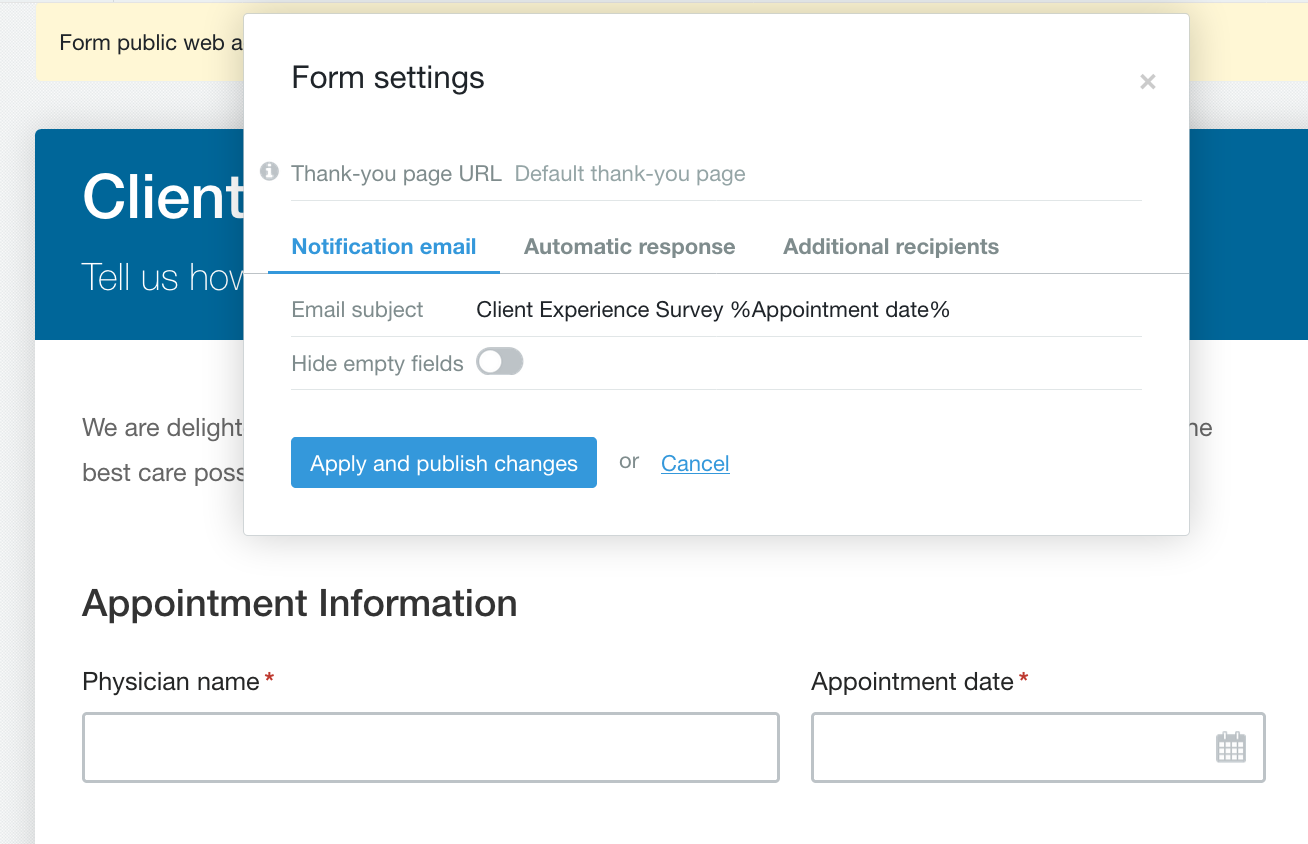
When your client fills out and submits a form, it arrives in your inbox with a subject line that you set when you build the form. By default, the subject line is Hush Secure Form. Most likely you will change the subject to better reflect the content of the form. You can also set the subject line to pull information from the form such as an appointment date. That way, at a glance you can immediately know detailed information about a particular form. There are plenty of opportunities to use this feature to identify the forms you receive.
Here’s how to use this feature:
Go to Form settings and Notification email. In Email subject, put the exact name of the field you want the information to come from between two % signs.
The field name between the %s must exactly match the field name on the form.
How to use the Repeater tool
You might have already noticed the Repeater option in the toolbar and wondered about its purpose. Clients are unique, and no standard form will meet everyone’s needs. The Repeater tool gives your clients a way to add extra information by repeating a field upon request.
Let’s say you want to allow your client to list multiple emergency contacts. With the Repeater tool you give your clients the ability to click on a link to add extra fields so they include more contacts.
Using this tool involves a few extra steps. Here’s how to use it to add the option for additional contacts.
Drag and drop the Repeater into the form where you want the emergency contact information to show up. Then drag Heading and Short text fields into the space that says “Drop controls here.”Include First name, Last name, Home phone number, and Email address. Be sure to include the heading “Emergency Contact Information.”
If you have trouble positioning the fields, make sure you’re paying attention to the location of the blue line. It will show you exactly where the field will show up on your form.
The last thing to do is add content to the New row prompt. We typed in “Add another emergency contact.” You can also control how many emergency contacts your client can add by using Minimum and Maximum rows. We chose to limit the number of additional contacts to three.
If you’re modifying a template, you can drag the Repeater below the original Emergency Contact fields and then drag the existing fields into the Repeater. The video below shows how to do this step by step.
And there you have it — a few extras to take your secure web forms to the next level.
If you have any questions or need a little hand-holding along the way, please feel free to reach out to our Customer Care Team.
Want to try Hush Secure Forms?
Sign up for Hushmail for Healthcare today and try it risk-free for 60 days.
|
|


